Alright folks! I am back with more installation guides. I’ve installed formr so many times at this point … since my first post, opencpu has updated to R 4+, and I’ve found a way to not use nginx. Which is good news, since it often conflicts with also running apache. I’m going to leave the old guides up because maybe they can help someone figure out their issues, but here goes with the newest guide.
This server is a clean install of Ubuntu 18.04. If all goes well, it also should work on Ubuntu 20, which is what I did for a temporary server. First step is always to update:
sudo apt-get update
sudo apt-get upgrade
Install OpenCPU
Check out the installation guide for OpenCPU and install it. I will note they have not updated their GitHub page as of today, so here’s an alternative link that appears to be updated more. Notice this is 2.2, which does include R4+.
# Requires Ubuntu 20.04 (Focal) or 18.04 (Bionic)
sudo add-apt-repository -y ppa:opencpu/opencpu-2.2
sudo apt-get update
sudo apt-get upgrade

# Installs OpenCPU server
sudo apt-get install -y opencpu-server
# Done! Open http://yourhost/ocpu in your browser
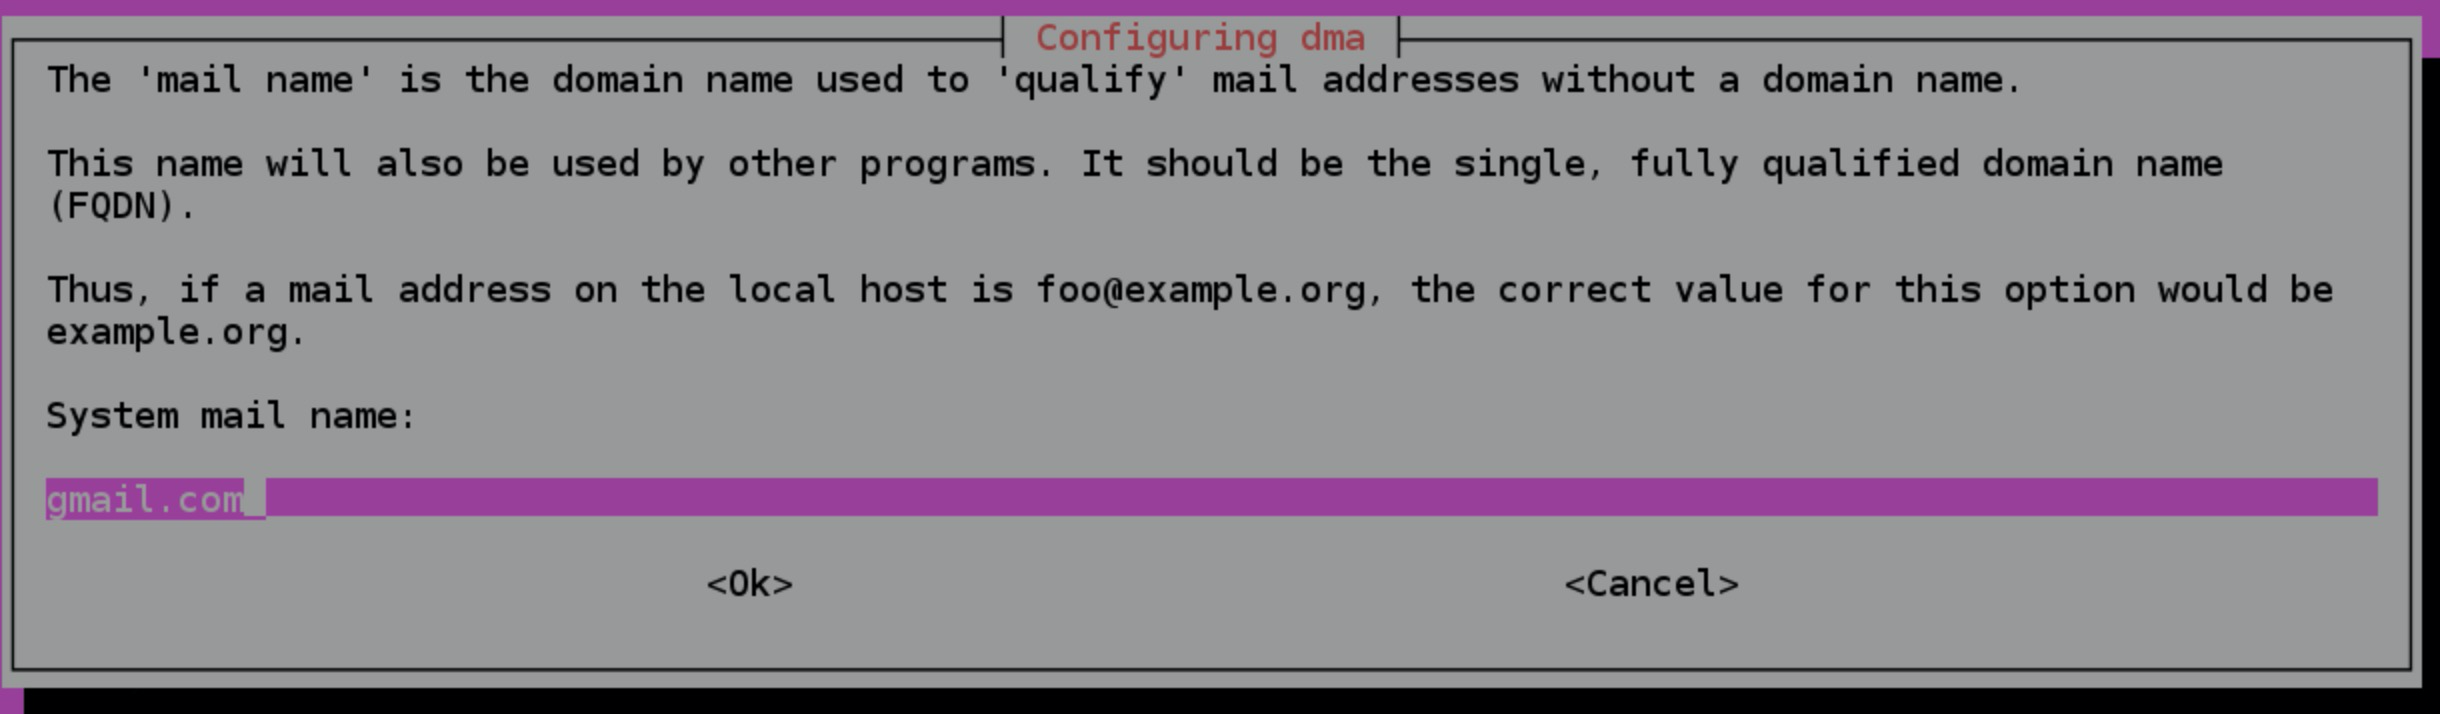
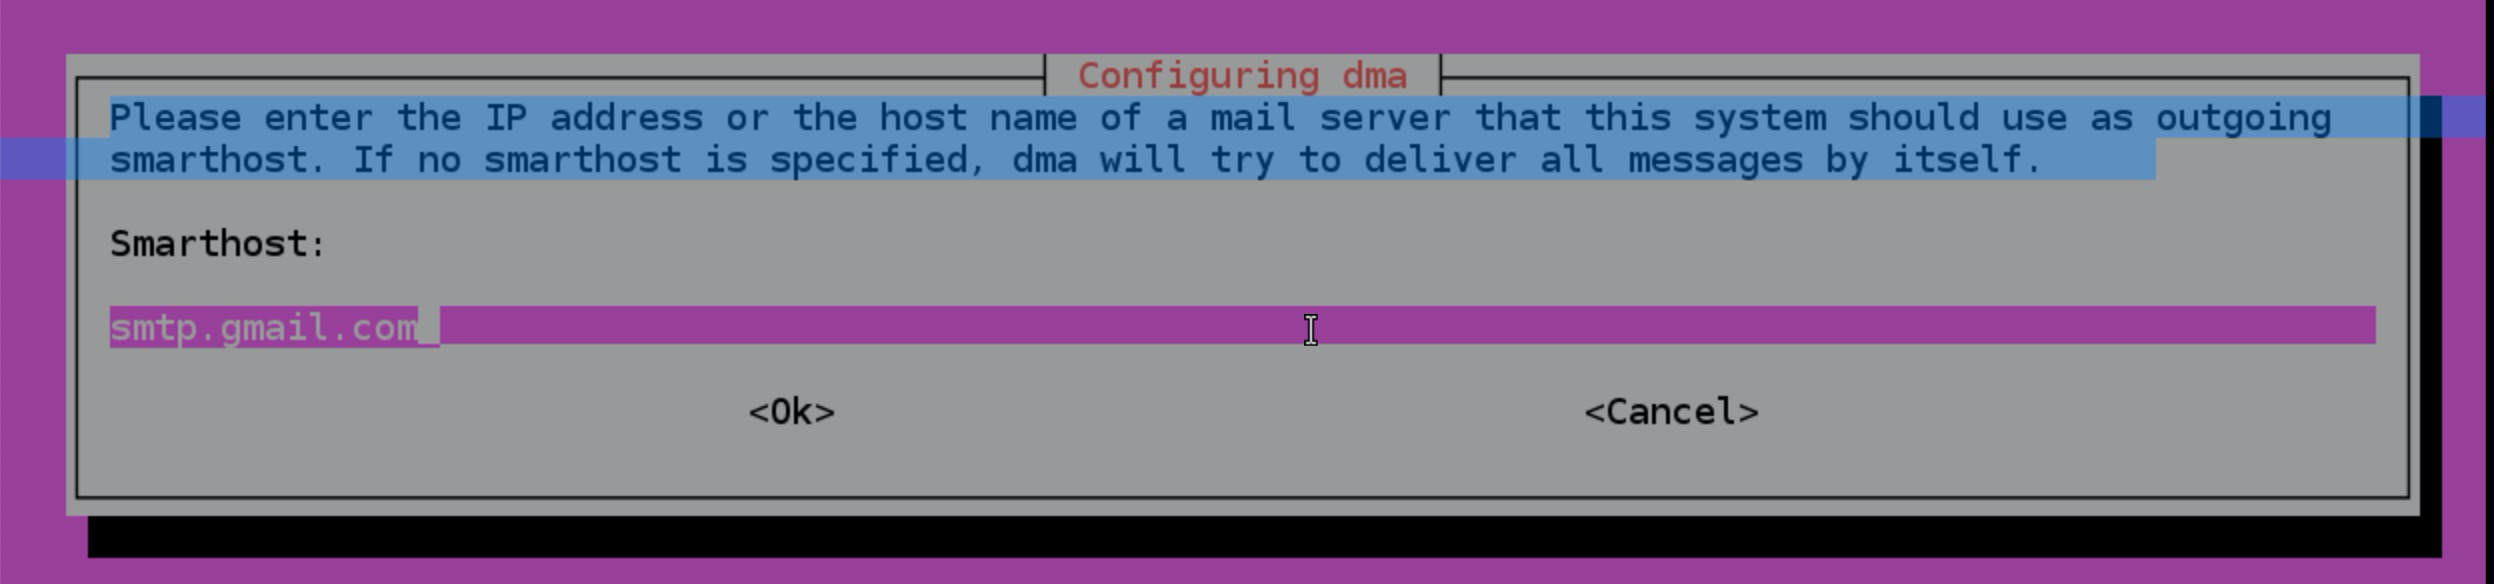
I set up the mail information to send from gmail.com, as that’s the email I wanted to tie the instance to:
Once it’s done, restart apache:
sudo systemctl restart apache2
You should now see the ocpu test page at http(s)://yourwebsite/ocpu - where yourwebsite is the IP address or name of your website.
Deal with R
Now that we have the opencpu, it has installed R for us. Let’s use:
sudo -i R
To enter R as the administrator. Can I just say I love this version of R: R version 4.0.3 (2020-10-10) -- "Bunny-Wunnies Freak Out". Now, let’s install packages and other things we need to run formr. Start with devtools, but watch for errors, as you may have to exit R and install Ubuntu packages to get the R packages to install. The most common error you will see is non-zero exit status which is jargon for “this didn’t work, maybe I’ll give you a hint”. Many package developers say something like “install X package” somewhere in the error output (bless you!), so that’s what to look for.
install.packages("devtools")
devtools::install_github("rubenarslan/formr")
#recommended by formr, pander is definitely necessary
install.packages(c("codebook", "tidyverse", "pander"))
Not sure what all to install? Other issues? Check out this guide which talks about issues with OpenCPU, R packages, and what formr.org has installed.
Exit R:
quit()
(I’m already suspicious because I didn’t get any errors!)
Edit Configurations
Open the configuration file for OpenCPU:
sudo nano /etc/opencpu/server.conf
- Edit the
key_lengthsetting from 13 to 50. - Also set the following packages to
"preload": ["stringr", "dplyr","knitr", "lubridate","formr", "rmarkdown"]. - Use
control + Xto save and exit.
I will note here - I am completely skipping the opencpu-cache step, which is what the nginx requirements were for. If you want to restart apache to make sure everything is still running, use: sudo service apache2 restart.
Other System Requirements
Specifically for formr, use the following code for the Ubuntu packages necessary:
sudo apt-get install git php apache2 mysql-server composer php-curl php-fpm php-mbstring php-mysql php-zip php-xml php-gd php-intl php-xml pandoc libsodium-dev
Use Supervisor to control email notifications and other session monitoring. Use the following code to install:
sudo apt install python-pip
pip install supervisor
Apache needs the rewrite mod enabled, which can be added by running the following:
sudo a2enmod rewrite
sudo systemctl restart apache2
Allow overrides for the virtual machine. First, open the configuration file:
sudo nano /etc/apache2/sites-enabled/000-default.conf
Put the following block on the end of the default configuration file (after </Virtualhost>) for Apache2 using:
	<Directory /var/www/html>
		Options Indexes FollowSymlinks MultiViews
		AllowOverride All
		Order allow,deny
		allow from all

	</Directory>
Install formr from GitHub
It’s suggested you put formr in the /var/www/ folder. Normally websites go in the /var/www/html folder, but we will include a symbolic link (i.e. connection) to know it should show the formr installation, even though it’s in a different folder. Use the following code to change folders and clone the GitHub folder.
cd /var/www/
sudo git clone https://github.com/rubenarslan/formr.org.git
Create the link between folders and fix access rights:
sudo ln -s /var/www/formr.org/webroot /var/www/html/formr
sudo chown -R www-data:www-data /var/www/formr.org
Now that we have that installed, let’s update application dependencies by using the following code:
cd formr.org #assumes you are still in /var/www/
sudo composer install
sudo composer update
The SQL Database
Login to the new SQL database using:
sudo mysql -uroot
Next, run the following commands changing EnterPassword to your desired password. In SQL, each line ends with ;, so you can run them one at a time if you want. NOte: this is a little updated from the original formr installation instructions because the MySQL syntax has changed a little bit.
CREATE DATABASE formr DEFAULT CHARACTER SET utf8 COLLATE utf8_unicode_ci;
CREATE USER 'formr'@'localhost' IDENTIFIED BY 'EnterPassword';
GRANT ALL PRIVILEGES ON formr.* TO formr@localhost;
FLUSH PRIVILEGES;
quit;
Next, import the initial required database structure by running (remember change EnterPassword, but leave the -p there!):
mysql formr -uformr -pEnterPassword < /var/www/formr.org/sql/schema.sql
Do the same procedure to apply patches 29 and 30, as required currently. Note that by doing just -p, you will be prompted to enter your password.
mysql formr -uformr -p < /var/www/formr.org/sql/patches/029_run_expire_cookie_setting.sql

mysql formr -uformr -p < /var/www/formr.org/sql/patches/030_sessions_queue.sql
Configuration Steps
Configuration Folder
Duplicate (don’t rename) the folder config-dist, name it config.
cd /var/www/formr.org/ #change to the right folder
sudo cp -avr config-dist config #copy the folder
You can type ls to show the folders in this formr.org folder if you want to make sure both folders are still there.
Settings.php
Open the configuration file:
sudo nano /var/www/formr.org/config/settings.php
- Here’s a list of everything I changed:
- login => ‘formr’
- password => ‘EnterPassword’ #from above!
- database => ‘formr’
- base_url => ‘https://IP_ADDRESS_OF_YOUR_FORMR_VM’#the opencpu section do both
- host (email) => ‘smtp.gmail.com’
- from (email) => our gmail account
- username/password for email
- timezone => ‘America/New_York’
Set paths and permissions
The following folders (and their sub-folders) have to be writable: /tmp and /webroot/assets/tmp. Use the following code (note: 777 necessary, I have tested it!):
sudo chmod -R 777 /tmp
sudo chmod -R 777 /var/www/formr.org/webroot/assets/tmp
If you are using gmail, you may need to turn OFF two factor authentication, and ON use less secure apps. I have a special gmail just for this stuff for that very reason.
Cron Jobs
To install the formr crontab in a linux system:
sudo nano /var/www/formr.org/config/formr_crontab
Delete the # from the line: \*/10 ... cron.php. Use ctrl + X to exit and then run:
sudo ln -s /var/www/formr.org/config/formr_crontab /etc/cron.d/formr
Now, restart apache one more time for good measure: sudo systemctl restart apache2.
Set Yourself Up
- Go to the site and register yourself as a user.
- Go back to the terminal to set up yourself as the administrator.
- Since the complete layout of the formr database may not be clear to those who didn’t write it, here’s some steps you can take to understand it:
- Log in to mysql (see above).
- Run
SHOW DATABASES;to see what’s available:
mysql> SHOW DATABASES;
+--------------------+
| Database           |
+--------------------+
| information_schema |
| formr              |
| mysql              |
| performance_schema |
| sys                |
+--------------------+
5 rows in set (0.00 sec)
- Select the formr database by using
USE formr;. - To see what’s in that database use
SHOW TABLES;. I’m not showing the output here because it’s long, but we are likely interested heresurvey_users. When you register, it sticks you into that table. - Use
DESCRIBE survey_users;to see the columns in that table. - Use
SELECT * FROM survey_users;to see all the data in that table. - Use
SELECT admin FROM survey_users;to show that you are not an admin:
mysql> SELECT admin FROM survey_users;
+-------+
| admin |
+-------+
|     0 |
+-------+
1 row in set (0.00 sec)
- To make yourself an admin, run
UPDATE survey_users SET admin = 100 WHERE id = 1;(the assumption here is that you are the only row in the table and are therefore, id number 1). - You should get a message that you updated your row but you can check it out with
SELECT admin FROM survey_users;to make sure it ran. - Now, when I log into my formr instance, I have rights to make surveys and manage users!